

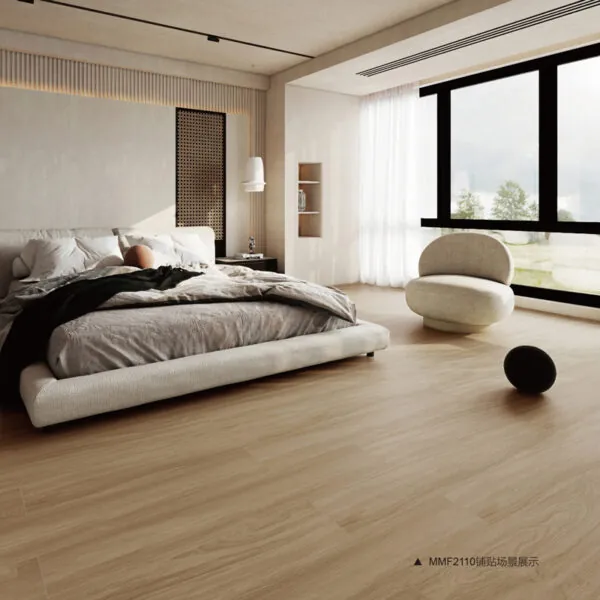
A wood-inspired wall surface can add visual warmth to a hospitality interior without repeating the same finish across every room. Its impact depends on location, scale, grain direction, lighting, and the materials around it. Before selecting wood effect wall tiles, decide what the wall needs to communicate: a welcoming entrance, a quieter guestroom backdrop, or a distinct zone within a shared space.
Wall tile is often noticed at eye level and from several distances. A detail that looks subtle in a sample may become a strong visual feature across a reception wall. Planning the surface as part of the room composition helps the design feel intentional and keeps it connected to the guest experience.
Give the Wall a Clear Role
Start with the function of the area. A reception backdrop may help identify the arrival point, while a wall behind seating can create a sense of enclosure. In a corridor, a limited feature section can mark a transition without turning the entire route into a focal display.
Locate the feature in the room
Review the floor plan and interior elevations to identify sightlines from entrances, lifts, seating areas, and circulation paths. Decide which views matter most and how much wall is visible from each. This helps determine whether the tile should cover a full plane, frame a niche, or appear as a vertical accent.
In a guestroom, a headboard wall can provide a visual anchor, while a smaller panel may be enough behind a desk or seating area. Consider furniture dimensions, lighting positions, and artwork before fixing the tile boundary. A feature should relate to those elements instead of competing with them.
Coordinate color and grain
Wood-like patterns vary in tone, grain scale, and direction. Choose references that work with the furniture, flooring, textiles, and metal finishes already planned. If those materials have strong patterns, a restrained grain can create balance. A more pronounced visual effect may suit a simpler palette, depending on the project’s design intent.
Review several pieces together, not just one tile. A larger layout shows how grain marks and color changes repeat across a wall. Ask the supplier what sample or product reference can represent the selected design, and keep it with the approved finish schedule.
Plan the Pattern and Wall Proportions
The arrangement influences how a wall is perceived. Horizontal lines can emphasize width, while vertical orientation can draw the eye upward. These are visual tools, not guaranteed effects, so consider the room’s ceiling height, furniture, and adjacent surfaces before choosing a direction.
Test layout options
Create a simple elevation showing tile dimensions, wall boundaries, doors, shelves, and lighting. Compare a few arrangements, including where the pattern starts and where cut pieces fall. This makes it easier to identify narrow strips around corners or openings before installation begins.
At full wall scale, the grain in wood effect wall tiles should be reviewed across the whole feature, not only in a close-up image. Discuss how the pattern should continue at corners or stop at a trim line. The installer can help review cuts and transitions before the order quantity is set.
Define edges and junctions
A feature wall often meets painted surfaces, cabinetry, stone, or another wall finish. Decide whether the edge should end at a corner, align with a cabinet, or use a trim detail. Also consider how the tile meets the floor and ceiling. Clear boundaries help the design look resolved from different viewpoints.
If the wall includes outlets, switches, mirrors, or shelves, mark their locations on the elevation. Their placement can interrupt a repeating grain or pattern. Confirm those details with the project team before finalizing the layout so the feature does not rely on last-minute adjustments.
Use Lighting to Shape the Experience
Lighting can bring out surface texture and change how color appears. Review samples under the planned wall lighting and general room illumination. Consider where fixtures cast shadows or reflections, particularly around reception desks, corridors, and seating areas.
A sample board viewed at different angles can help the team assess the effect before installation. Compare it with fabrics and finishes used in the space. If the design includes layered lighting, check how the wall reads under each setting rather than judging it only under bright showroom conditions.
Make the Feature Part of the Interior Story
A considered wall feature begins with a defined role and a measured layout. Place it where it supports the room, coordinate grain and color with nearby finishes, and review edges and lighting before installation. This gives the wall a clear visual purpose while keeping it connected to the wider hospitality interior.
JLA Ceramics is a ceramic and porcelain tile manufacturer with a product range that includes wood-look tiles for interior design projects. Their collection gives designers and project buyers options to consider when coordinating wall finishes with furniture, flooring, and other interior materials.
They also offer custom design and OEM services for project requirements. Buyers can contact JLA Ceramics to discuss wood-look tile options and confirm product details for their intended wall applications.
